Home > Mailchimp
Mailchimp
ARForms has a new extension that gives a facility to add more fields to your MailChimp subscriber list. ARForms Advance Mailchimp is just another WordPress plugin that you can install and manage just like other WordPress plugins.
ARForms Advance Mailchimp plugin integrates your form entries in a single process. You can add more information about your subscriber in the MailChimp list after form submission from ARForms.
Mailchimp Addon Key Features
- Configuration for Advance Mailchimp Addon
- Easy installation
- Easy to map form fields with Mailchimp subscriber list
Steps For Installation And Activation
You can install plugin either of these two methods.
- New install via FTP
- New install via the WordPress Uploader
a. Download the plugin from CodeCanyon, and extract it. You should find a directory arformsadvancemailchimp.
b. In your WordPress installation, upload arformsadvancemailchimp to wp-content/plugins/
c. Activate the “Advance Mailchimp For ARForms” plugin through the Plugins menu from WordPress admin panel.
a. Download the plugin from CodeCanyon
b. Log in to your WordPress admin panel
c. go to Plugins -> Add New -> Upload
d. Click on choose file and browse the download package from CodeCanyon. When the plugin uploads successfully, click on Activate Plugin.
After activating the plugin, generate API Key for your Mailchimp account if you do not have by following instructions below.
Go to https://admin.mailchimp.com/account/api/
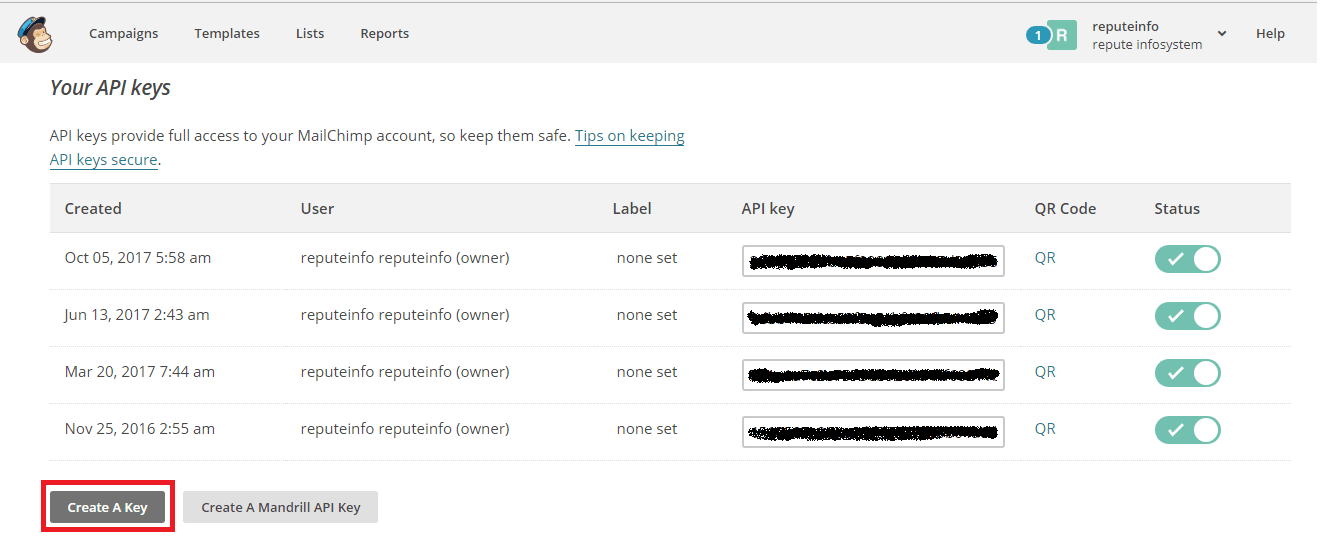
Click on Create A Key button, your API key will be generated automatically. Copy that API key to use in ARForms Advance Mailchimp Configuration. After that, you need to create a list from the Lists menu at the top.
Click on Create List button to create a new list.
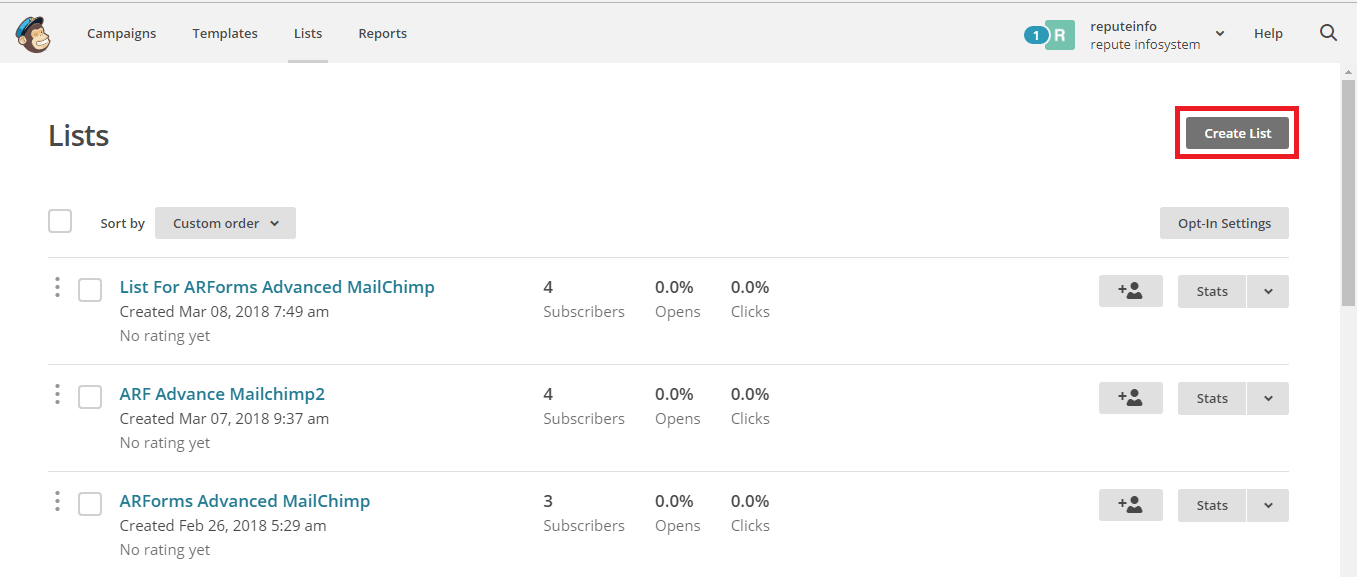
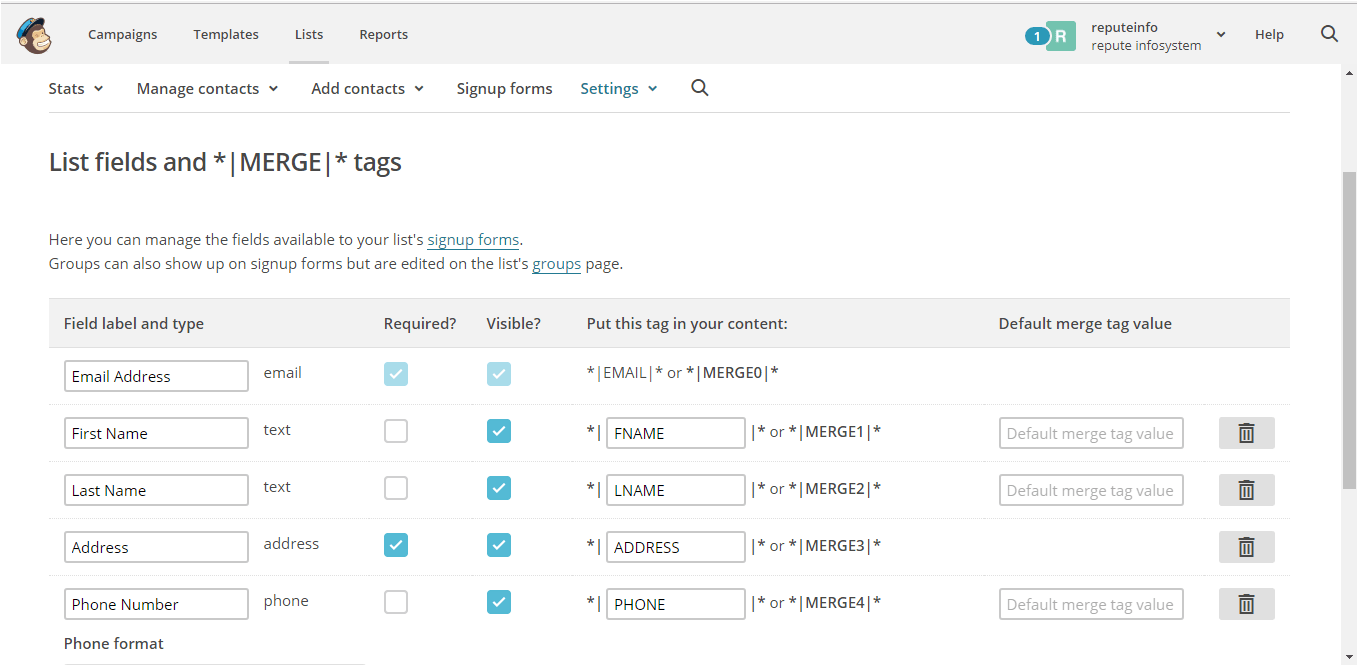
After creating a list, click on the created list and go to Settings > List fields and *|MERGE|* tags menu. You will see the list of fields and it’s properties. You will see a list of fields and it’s properties. You can add or delete fields over there.
Save your changes and go to the ARForms Global settings to configure MailChimp.
Mailchimp Configuration
Go to ARForms > Global Settings > Email Marketing Tools tab and enter API Key at MailChimp block and click on Verify link.

After verifying successfully, you will have all subscriber lists loaded at List ID.
Select your subscriber list there and save your configuration changes.
Advance Mailchimp Option
After complete, the MailChimp configuration add / edit form from ARForms > Manage Forms where you have Opt-ins menu at top of the form editor.
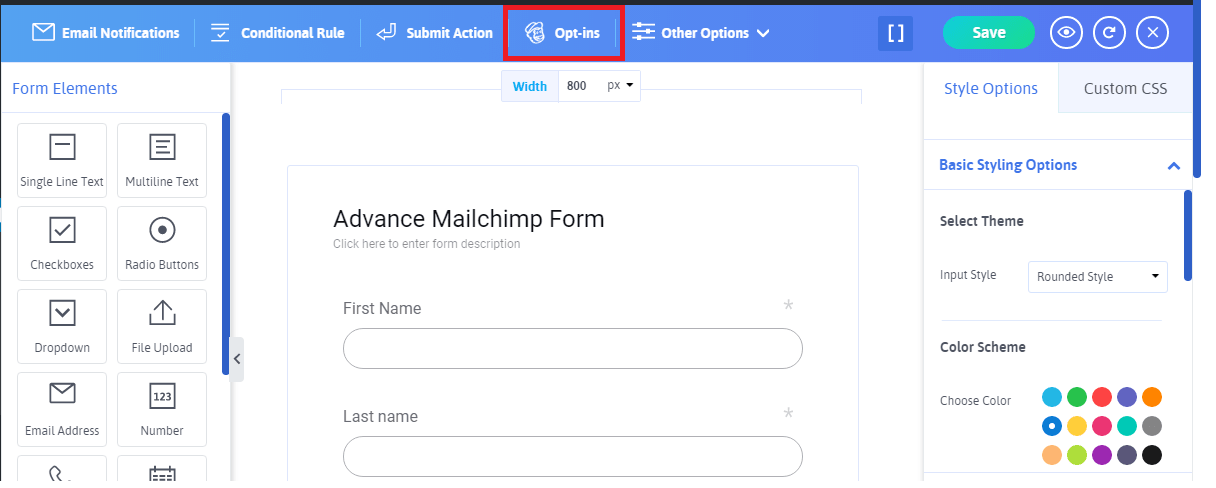
Click on the Opt-ins menu to open Opt-ins configuration modal where you can see Mailchimp in the Opt-ins provider list. Enable Mailchimp opt-ins from here and map First name, Last name and Email fields from Form fields mapping section.
You have another list of all fields available in your Mailchimp subscriber list. Map your fields here, you have to map fields which are marked as required(*). Save form after mapping fields at Opt-ins.
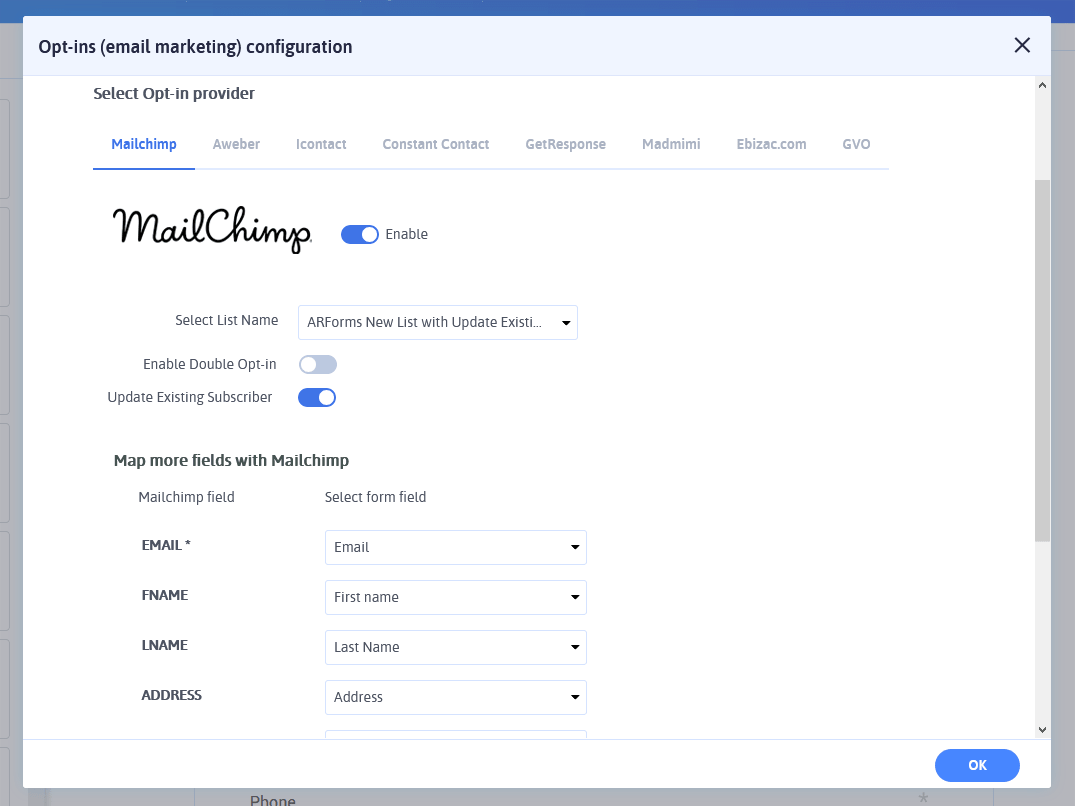
Now whenever the user submit your form, the user will be subscribed to your Mailchimp subscriber list automatically.
Changelog
Version 1.2 (02 January, 2020)
- Added compatibility for ARForms version 4.0
- Minor bug fixes.
Version 1.1 (19 March, 2019)
- Updated MailChimp API v3
Version 1.0.1 (19 November, 2018)
- Minor bug fixes.